Fostering critical thinking isn’t about having more creative toys or a list of ‘fun’ activities. Many parents focus on the ‘what’ of science experiments, missing the real lesson. The key is to shift from being an entertainer to an ‘inquiry coach.’ This guide shows you how to use a simple ‘If… then… because…’ framework to turn everyday play and annoying habits—like dropping food—into powerful, structured lessons in scientific reasoning that will last a lifetime.
As a parent, you’re likely familiar with the endless stream of « why » questions. Why is the sky blue? Why do birds fly? Why can’t I eat cookies for breakfast? While it’s tempting to provide a quick answer to move on with your day, each of these questions is a golden opportunity. It’s an invitation from your child to explore the world with them. The common advice is to encourage play, do simple experiments, or ask open-ended questions. These are all valid, but they often miss the most crucial element: a structured framework for thinking.
Merely mixing colors or dropping objects in water can be entertaining, but it doesn’t automatically build critical thinking skills. The magic happens when you, the parent, step into the role of an ‘inquiry coach.’ This means you stop being the source of all answers and instead become the guide who helps your child build the skills to find answers themselves. It’s the difference between telling them a fish can breathe underwater and guiding them to ask, « How does it do that? What would happen if it came out of the water? »
But what if the real secret wasn’t just asking more questions, but in teaching your child a simple, powerful method to test their own ideas? This is the power of the hypothesis. By embracing a simple « If… then… because… » structure, you can transform everyday moments of curiosity into foundational lessons in the scientific method. This approach doesn’t require a lab coat or expensive equipment; it just requires a shift in perspective. You’re not just parenting; you’re cultivating a budding scientist.
This article will provide you with concrete, playful experiments that serve as a training ground for this skill. We will explore how to turn simple household activities into structured hypothesis tests, decode the scientific reasoning behind a baby’s seemingly random habits, and master the art of asking questions that ignite curiosity rather than extinguish it. Get ready to transform « I don’t know » into your family’s new favorite phrase: « Let’s find out. »
To help you navigate these concepts, this guide is structured around a series of practical, hands-on activities and the core principles that make them effective. You can explore each section to build a complete toolkit for becoming your child’s trusted inquiry coach.
Summary: From « Why? » to « What If? »: A Parent’s Guide to Hypothesis Testing
- Sink or Float: Testing Household Objects in a Bowl of Water
- Color Prediction: What Happens When We Mix Blue and Yellow?
- The Dark Cupboard: Does a Plant Need Light to Grow?
- Ice Rescue: Salt vs Sugar vs Hot Water – What Melts Ice Fastest?
- The Balance Scale: Guessing Which Object Is Heavier
- Open-Ended Questions: Why « Why » and « How » Are Better Than « What »?
- The « Dropping Game »: Why Your Baby Keeps Throwing Food on the Floor?
- How to foster Critical Thinking Skills in Preschoolers?
Sink or Float: Testing Household Objects in a Bowl of Water
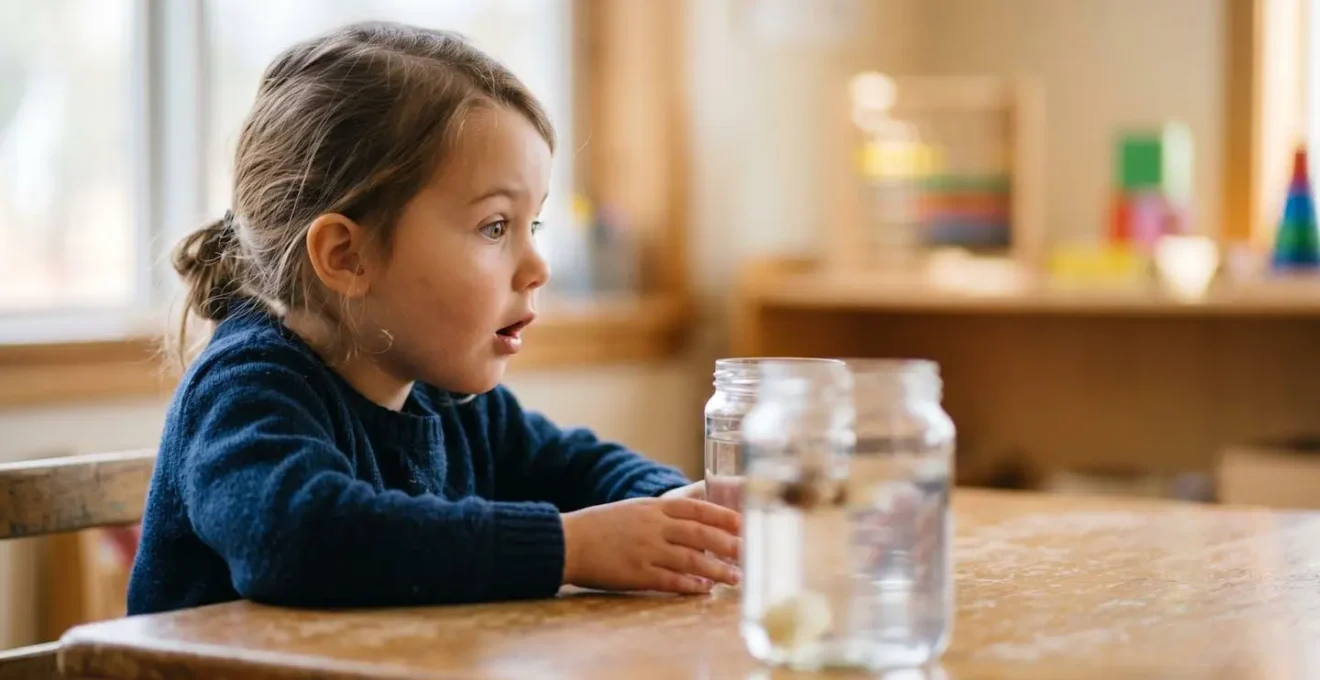
The classic sink-or-float game is the perfect entry point into hypothesis-driven thinking. It’s simple, requires minimal setup, and the results are immediate and observable. However, its true educational power isn’t in just watching things sink or float. It’s in the process of prediction and reflection. Before a single object touches the water, you have the opportunity to coach your child through their first formal hypothesis. This transforms a simple game into a structured scientific experiment.
The goal is to move beyond a simple guess. As an inquiry coach, your role is to prompt them to articulate their reasoning. Ask, « Why do you think the spoon will sink? » They might say, « Because it’s heavy! » or « Because it’s made of metal. » This « because » is the heart of the hypothesis. It connects their prediction to a reason, which can then be tested. This practice teaches them that scientific ideas are based on logic and evidence, not just random chance. The visual contrast between a floating wooden block and a sinking metal spoon provides a clear, tangible outcome to compare against their initial prediction.
As you can see, observing how different materials interact with water makes abstract concepts like density and buoyancy visible and understandable. After each test, discuss the result. Was their hypothesis correct? Why or why not? This reflective loop is where the real learning is consolidated. It’s not about being « right » or « wrong, » but about refining their understanding based on new evidence. This simple activity lays the groundwork for all future scientific inquiry by establishing the core cycle of predict, test, observe, and reflect.
Your Action Plan: The Sink or Float Hypothesis Test
- Gather 5-7 household objects of varying materials (wooden block, rock, plastic toy, metal spoon, cork, sponge).
- Before testing each object, ask the child to make a prediction using the hypothesis framework: ‘If I put [object] in water, then it will [sink/float] because [their reasoning].’
- Document their predictions on a simple chart with columns for ‘Object,’ ‘My Hypothesis,’ and ‘What Actually Happened.’
- Test each object one at a time in a clear bowl of water, observing and discussing the results.
- Extend the challenge: Provide aluminum foil and ask, ‘How can we make this sinking object float?’ Guide them to create a boat shape, introducing basic engineering principles.
- Reflect together: ‘What surprised you? What pattern did you notice about which objects floated?’
Color Prediction: What Happens When We Mix Blue and Yellow?
Color mixing is another preschool staple that can be elevated from a simple art project to a powerful lesson in scientific reasoning. The allure of creating a new color is naturally exciting for a child, but the real cognitive benefit comes from framing the activity around a testable prediction. Instead of simply handing over blue and yellow paint, you start by coaching the question: « What do you think will happen if we mix these two colors together? » This immediately shifts the focus from a passive activity to an active investigation.
Encourage your child to form a complete hypothesis: « If I mix blue and yellow, then it will make green, because my green crayon looks like both colors mixed up. » This statement is more than a guess; it’s a theory based on prior observation. This process is incredibly effective. In fact, a structured preschool program found that children who were coached to articulate their reasoning with an « If… then… » framework before mixing colors showed significantly stronger retention of color theory concepts. It also helped them apply that thinking to other areas, like math.
The experiment doesn’t end when they make green. That’s just the beginning. The next step is to introduce variables. Ask follow-up questions to prompt further hypotheses: « What if we add more yellow? What color will it make then? » or « How could we make a darker green? » Each question sparks a new cycle of predict-test-observe, teaching them about proportions and variations in a hands-on, intuitive way. They are no longer just painting; they are conducting iterative tests and learning the fundamentals of causal reasoning—that specific actions (adding more yellow) lead to predictable results (a lighter green).
The Dark Cupboard: Does a Plant Need Light to Grow?
This experiment introduces a slightly more advanced—and crucial—scientific concept: the control group. By using two identical plants, you can create a clear, side-by-side comparison that isolates a single variable: light. This moves beyond simple observation into the realm of controlled experimentation, a cornerstone of the scientific method. The setup itself tells a story. One plant gets everything it needs to thrive on a sunny windowsill, while its twin is placed in a dark cupboard. This powerful visual narrative makes the abstract concept of « needs » tangible.
Before starting, prompt the hypothesis: « If we put a plant in a dark cupboard, then what do you think will happen to it? Why? » This question encourages them to think about cause and effect over a longer period. Unlike the instant results of color mixing, this experiment teaches patience and the importance of systematic observation over time. You can help them create a simple observation journal, drawing a picture of each plant every few days. This documents the changes and makes the slow, gradual process of wilting or growing more concrete and understandable for a young child.
Engaging children in these foundational science activities at an early age is more critical than many realize. Research from Horizon Education Centers indicates that by age 7, children develop either positive or negative attitudes toward science that can remain deeply entrenched. By framing science as a fun, empowering process of discovery, you are nurturing a positive, lifelong relationship with learning and inquiry. The dark cupboard experiment isn’t just about photosynthesis; it’s about showing them how to ask a question and design a fair test to find the answer—a skill that transcends science.
Ice Rescue: Salt vs Sugar vs Hot Water – What Melts Ice Fastest?
The « ice rescue » experiment is a fantastic way to introduce the concept of comparing variables. The premise is simple and engaging: freeze a small toy inside a block of ice and challenge your child to figure out the fastest way to « rescue » it. This scenario naturally invites experimentation. Instead of just one solution, you can present several options—salt, sugar, hot water, and even room temperature water—and frame it as a race. This immediately sparks curiosity and a desire to find the « best » method.
As the inquiry coach, your job is to structure this race as a scientific investigation. Before they start, ask them to form a hypothesis for each method: « If I use salt, then it will melt the ice faster than sugar because… » They might not know the scientific reason, but encouraging them to guess (« …because salt is rougher? ») is part of the process. This activity is perfect for demonstrating that different substances or conditions can have dramatically different effects. It moves beyond a simple « what happens if » to « what happens when I compare A, B, and C? »
The table below breaks down what your child might observe. It provides a clear way to compare the results and introduces simple, child-friendly explanations for why each method works differently. This helps connect their hands-on observations to the underlying scientific principles in a way that is accessible and easy to remember.
| Melting Method | Approximate Time to Free Object | Observable Effect | Child-Friendly Explanation |
|---|---|---|---|
| Hot Water (40°C/104°F) | 2-3 minutes | Rapid melting, immediate visible effect | Heat energy transfers quickly to ice, making molecules move faster |
| Table Salt | 5-7 minutes | Creates tunnels in ice, localized melting | Salt disrupts ice crystal structure, lowers freezing point |
| Sugar | 8-10 minutes | Slower, more uniform melting | Sugar has a weaker effect on freezing point than salt |
| Room Temperature Water | 10-15 minutes | Gradual, even melting | Gentle heat transfer from warmer liquid to frozen solid |
After the race is over and the toy is freed, the final step is reflection. Which method won? Did the results match their predictions? This comparison of multiple variables teaches a sophisticated level of critical thinking, laying the foundation for understanding experimental design and data analysis in a fun, memorable context.
The Balance Scale: Guessing Which Object Is Heavier
Our brains are wired to use mental shortcuts, and a common one is « bigger equals heavier. » A simple balance scale is the perfect tool to challenge this assumption and teach a fundamental scientific lesson: our observations can be misleading. The goal of this activity is to intentionally pit a child’s visual prediction against a physical, measurable reality. By presenting them with objects of mismatched size and weight—like a large foam ball and a small metal car—you create a moment of cognitive dissonance that sparks true learning.
The process begins with a hypothesis based purely on sight. Hold up the two objects and ask, « Which one do you think is heavier? Why? » In one notable preschool curriculum designed to challenge these visual assumptions, a majority of children initially predicted that larger objects would be heavier. They were confident in their hypothesis: « If the ball is bigger, then it will be heavier, because it takes up more space. » This is a perfectly logical, albeit incorrect, assumption. The magic happens when they place the objects on the scale and see it tip in the unexpected direction.
This « Aha! » moment is incredibly powerful. It doesn’t just teach them about weight; it teaches them that ideas, even ones that seem obvious, must be tested. It cultivates a healthy skepticism and reinforces the core message that evidence trumps assumption. You can extend this learning by introducing non-standard measurement. Ask, « How many wooden blocks does it take to balance the apple? » This turns the scale into a tool for comparison and early mathematical reasoning, bridging the gap between scientific inquiry and numeracy. They are learning that « heavier » isn’t just a feeling, but something that can be quantified and proven.
The « Dropping Game »: Why Your Baby Keeps Throwing Food on the Floor?
It’s one of the most frustrating and universal parenting experiences: the « dropping game. » You hand your baby a piece of food or a toy, and they promptly, and with great focus, drop it on the floor. You pick it up, and they do it again. And again. While it feels like a test of your patience, it’s actually one of your child’s very first physics experiments. This isn’t a behavior to be corrected; it’s a developmental milestone to be understood. Your baby is not trying to annoy you; they are a developmental scientist at work, testing the laws of gravity.
This behavior is deeply rooted in cognitive development. In fact, pediatric research shows that around 6 months old, babies begin to master voluntary release, and this phase of exploration typically lasts until they are about a year old. Each drop is a mini-experiment. They are forming and testing a hypothesis: « If I let go of this object, then it will fall down. » The repetition isn’t defiance; it’s a scientist repeating a trial to confirm the results. They are learning about cause and effect, object permanence (the object still exists even when they can’t see it), and the fundamental properties of the physical world.
As Dr. Bridget McArdle, a pediatrician with Henry Ford Health System, explains, this is all part of their deep-seated need to understand their environment. She puts it this way:
Babies are exploring the world. They want to touch things, taste things and, of course, see things. It may get a bit pesky but remember that they have to learn everything about the world around them, even the simplest things.
– Dr. Bridget McArdle, Pediatrician with Henry Ford Health System
So the next time a piece of broccoli hits the floor, try to see it through this lens. Instead of showing frustration, you can become their first inquiry coach. Narrate the experiment: « You dropped it! It went down. Let’s see what happens if you drop the spoon. » You are giving them the language to describe their scientific discoveries and reinforcing that their curiosity is a wonderful, powerful thing.
Open-Ended Questions: Why « Why » and « How » Are Better Than « What »?
If hypothesis testing is the engine of critical thinking, then open-ended questions are the fuel. As an inquiry coach, your most powerful tool is the ability to ask questions that open up thinking rather than shut it down. The difference often comes down to a single word. « What » questions tend to have a single, correct answer (« What color is this? »). They test memory. But « why » and « how » questions are different. They invite speculation, reasoning, and creativity. They test thinking.
Consider the sink-or-float experiment. After a rock sinks, asking « What happened? » elicits a simple response: « It sank. » But asking « Why do you think it sank? » or « How could we make it float? » opens up a world of possibilities. It prompts the child to revisit their hypothesis, consider the properties of the object, and engage in problem-solving. This shift in questioning is crucial. Just as quality training empowers educators, parents who master this technique can profoundly impact their child’s cognitive development. A 2024 study on STEM professional development highlighted that when teachers are trained in these inquiry-based practices, their effectiveness in fostering student engagement and understanding soars.
Not all open-ended questions are the same. You can tailor your questions to encourage different types of thinking. By building a mental toolkit of question types, you can guide your child’s exploration with more intention and purpose. Here are a few frameworks to consider:
- Investigative Questions: ‘Why do you think that happened?’ or ‘What made the water change color?’ — These encourage causal reasoning and hypothesis formation.
- Creative Questions: ‘How else could we solve this problem?’ or ‘What other materials might work?’ — These promote divergent thinking and problem-solving flexibility.
- Empathic Questions: ‘How do you think the plant felt without sunlight?’ or ‘What would it be like to be an ice cube melting?’ — These build emotional intelligence through scientific narrative.
- Predictive Questions: ‘What do you think will happen next?’ or ‘If we change this, what might be different?’ — These develop forecasting skills and logical sequencing.
- Reflective Questions: ‘What surprised you most?’ or ‘How has your thinking changed?’ — These consolidate learning and promote metacognition.
Mastering this questioning technique is perhaps the most sustainable skill you can develop as an inquiry coach. The experiments will change, but the ability to guide your child with thoughtful, open-ended questions will empower their learning for years to come.
Key takeaways
- Shift your role from ‘answer-giver’ to ‘inquiry coach’ by guiding your child through the scientific process.
- Use the « If… then… because… » framework to help children articulate testable predictions, which strengthens their reasoning skills.
- Frame everyday activities and even frustrating habits, like dropping food, as natural experiments in cause and effect.
How to foster Critical Thinking Skills in Preschoolers?
We’ve journeyed through bowls of water, cups of paint, and dark cupboards. We’ve seen that the drive to understand the world starts with the simple, repetitive drop of a spoon from a highchair. The common thread through all these activities is not the materials or the outcomes, but the mindset you bring as a parent. Fostering critical thinking is less about a checklist of experiments and more about cultivating an environment of curious, structured inquiry. It’s about celebrating the question as much as, if not more than, the answer.
This approach aligns with what educators and researchers know to be true. As a recent publication in the Early Childhood Education Journal confirms, young children are natural scientists. Our role is not to implant knowledge but to intentionally design experiences that allow them to build their own. Your home is their first laboratory. Every « mess » is a potential dataset, and every « why » is a potential research question. By embracing the role of an inquiry coach, you are giving your child the most valuable gift of all: the confidence to say « I don’t know » and the tools to follow it up with « Let’s find out. »
The ultimate goal is to internalize this process, so it becomes a natural way of thinking for your child. When they encounter a problem—whether it’s a toy that won’t work or a disagreement with a friend—they will have a framework to fall back on. They will learn to observe, form a theory about what’s happening, test a solution, and reflect on the outcome. This is the essence of critical thinking, and it’s a skill that will serve them far beyond the preschool years, in every aspect of their lives.
Start today. The next time a question arises, resist the urge to answer. Instead, smile, look at your little scientist, and ask, « That’s a great question. What’s your hypothesis? »